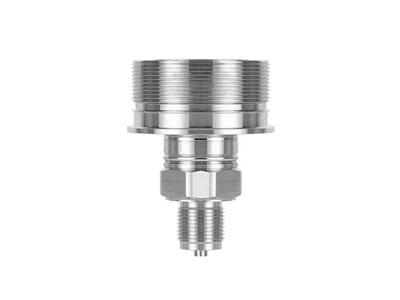
Hey there, solar energy enthusiasts! As a supplier of ex proof pressure sensors, I'm stoked to share with you how to install an ex proof pressure sensor in a solar energy system. These sensors are super important in solar setups, helping to keep everything running smoothly and safely. So, let's dive right in!
Why You Need an Ex Proof Pressure Sensor in Your Solar System
First off, you might be wondering why you even need an ex proof pressure sensor in a solar energy system. Well, solar systems often have components that operate under pressure, like hydraulic systems in solar trackers or fluid-filled pipes in solar thermal collectors. An ex proof pressure sensor can accurately measure this pressure, making sure the system is working at its best.
Ex proof, or explosion-proof, sensors are designed to prevent any potential sparks or heat from the sensor from causing an explosion in a hazardous environment. In a solar system, this is crucial because there could be flammable gases or vapors around, especially in areas with battery storage or chemical processing.
Choosing the Right Ex Proof Pressure Sensor
Before you start the installation, you need to pick the right sensor for your solar system. There are a few things to consider:
- Pressure Range: You need to know the maximum and minimum pressure that your system will experience. Make sure the sensor you choose can handle this range. For example, if your system operates between 0 and 100 psi, get a sensor with a suitable range.
- Accuracy: The accuracy of the sensor is important for getting reliable pressure readings. Look for a sensor with a high level of accuracy, especially if your system requires precise pressure control.
- Environment: Consider the environment where the sensor will be installed. If it's going to be in a wet or dusty area, you'll need a sensor that's protected against these conditions.
Some of the great options we offer include the SMP131-TLN Gauge Pressure Transmitter, the SMP131-TSD-S Gauge Pressure Transmitter, and the SMP131-TLD(H) Absolute Pressure Transmitter. These transmitters are known for their quality and reliability in various applications.
Installation Steps
Step 1: Gather Your Tools
You'll need a few tools for the installation, such as a wrench, screwdriver, and possibly a sealant. Make sure you have everything on hand before you start.
Step 2: Power Down the System
Safety first! Before you start working on the solar system, turn off the power. This will prevent any electrical shocks or damage to the system.
Step 3: Find the Right Location
Locate the area in the solar system where you want to install the pressure sensor. It should be in a place where it can accurately measure the pressure of the fluid or gas in the system. Avoid areas with excessive vibration or heat, as this can affect the sensor's performance.
Step 4: Prepare the Mounting Surface
Clean the mounting surface to ensure a good seal. If necessary, use a sealant to prevent any leaks. Make sure the surface is flat and free of any debris.
Step 5: Install the Sensor
Carefully install the pressure sensor on the mounting surface. Use the appropriate wrench to tighten the sensor securely, but don't over-tighten it, as this can damage the sensor.
Step 6: Connect the Wiring
Connect the wiring to the sensor according to the manufacturer's instructions. Make sure the connections are tight and secure. Use wire connectors or soldering to ensure a good electrical connection.
Step 7: Test the Sensor
Once the sensor is installed and wired, turn on the power and test the sensor. Check the pressure readings to make sure they are accurate. If there are any issues, double-check the installation and wiring.
Troubleshooting
Even with a proper installation, you might run into some issues with the pressure sensor. Here are some common problems and how to fix them:
- Inaccurate Readings: If the sensor is giving inaccurate readings, check the wiring connections and make sure they are tight. Also, check the pressure range of the sensor to make sure it's suitable for your system.
- Leakage: If there is a leak around the sensor, check the sealant and make sure it's properly applied. You may need to reapply the sealant or replace the sensor if the leak persists.
- No Power: If the sensor is not getting power, check the wiring and make sure it's connected correctly. Also, check the power supply to make sure it's working properly.
Maintenance
To keep your ex proof pressure sensor working properly, you need to perform regular maintenance. Here are some tips:
- Clean the Sensor: Periodically clean the sensor to remove any dirt or debris. Use a soft cloth and a mild cleaning solution.
- Check the Wiring: Regularly check the wiring connections to make sure they are tight and secure. Look for any signs of wear or damage.
- Calibrate the Sensor: Over time, the sensor may need to be calibrated to ensure accurate readings. Follow the manufacturer's instructions for calibration.
Conclusion
Installing an ex proof pressure sensor in a solar energy system is not as difficult as it may seem. By following the steps outlined in this blog, you can ensure a successful installation and keep your solar system running smoothly.


If you're interested in purchasing an ex proof pressure sensor for your solar energy system, don't hesitate to reach out. We're here to help you choose the right sensor for your needs and provide any support you may need during the installation and maintenance process.
References
- Manufacturer's manuals for SMP131-TLN Gauge Pressure Transmitter, SMP131-TSD-S Gauge Pressure Transmitter, and SMP131-TLD(H) Absolute Pressure Transmitter.
- Industry standards for ex proof pressure sensors in solar energy systems.